
Overload Hockey
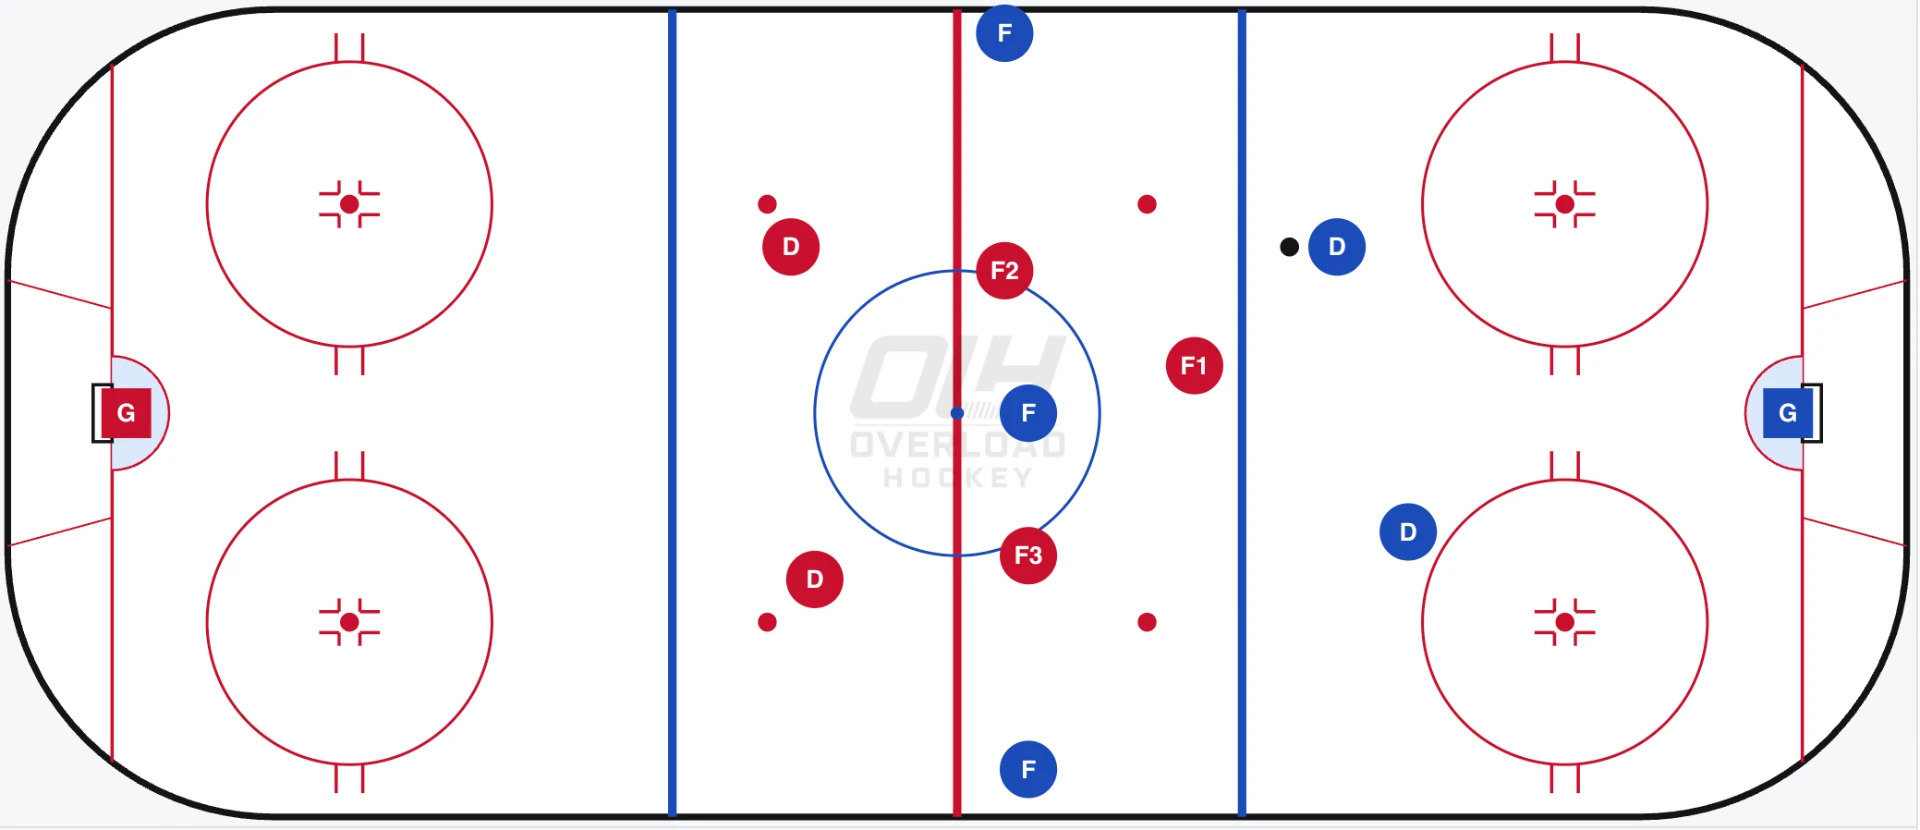
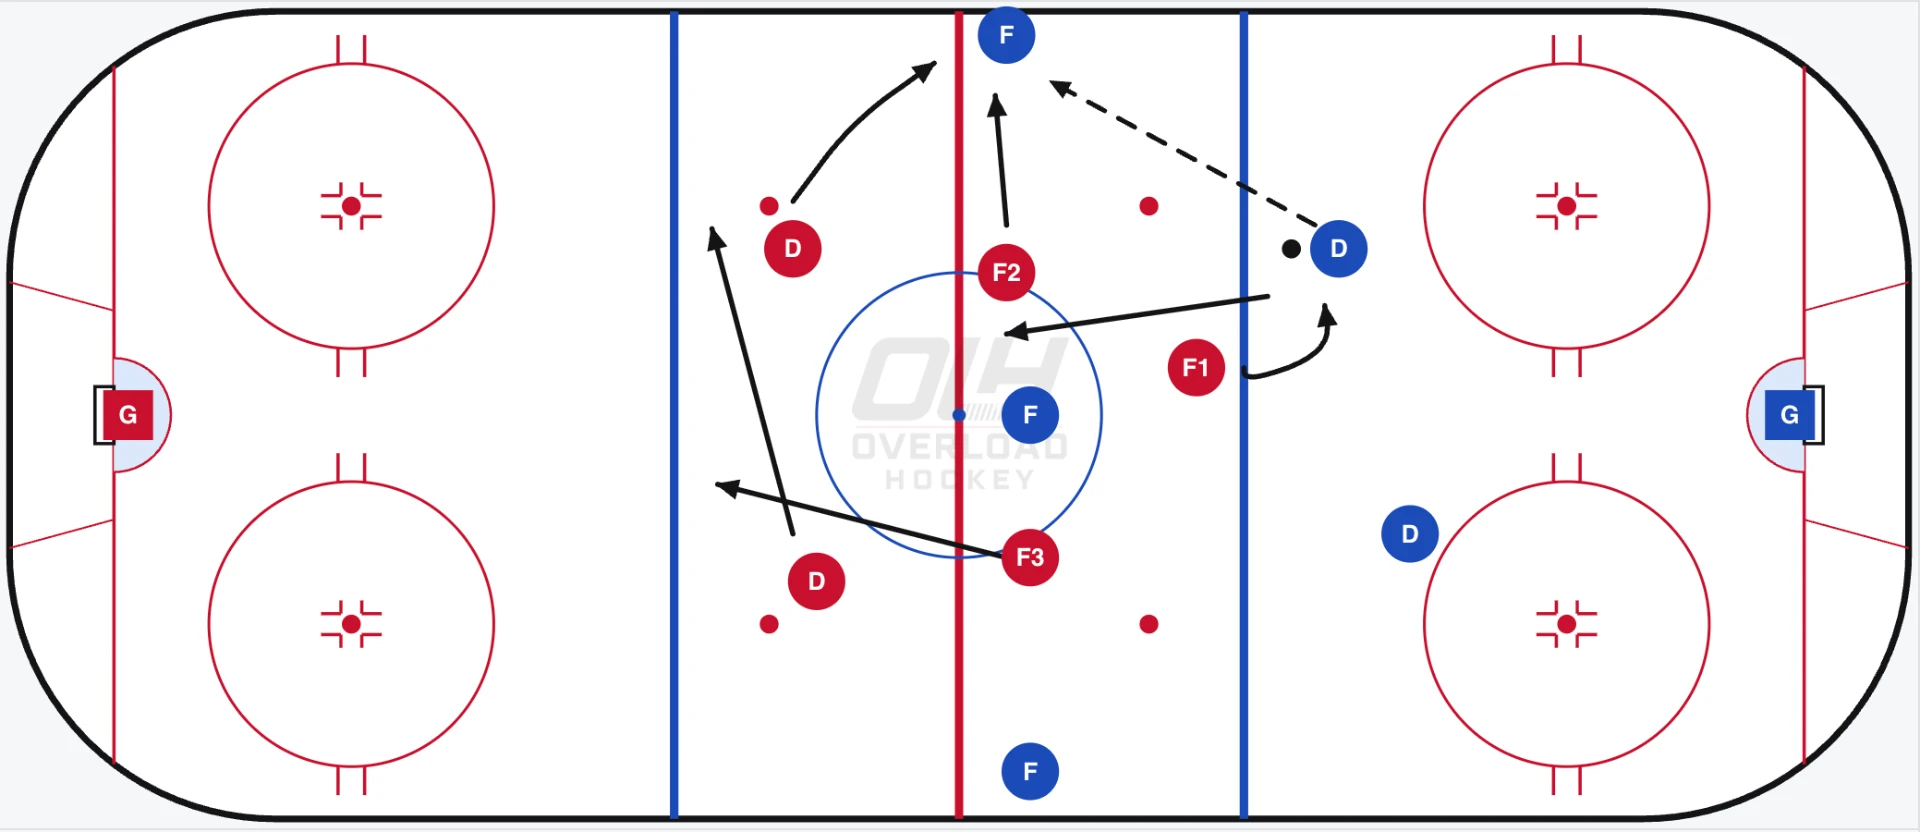
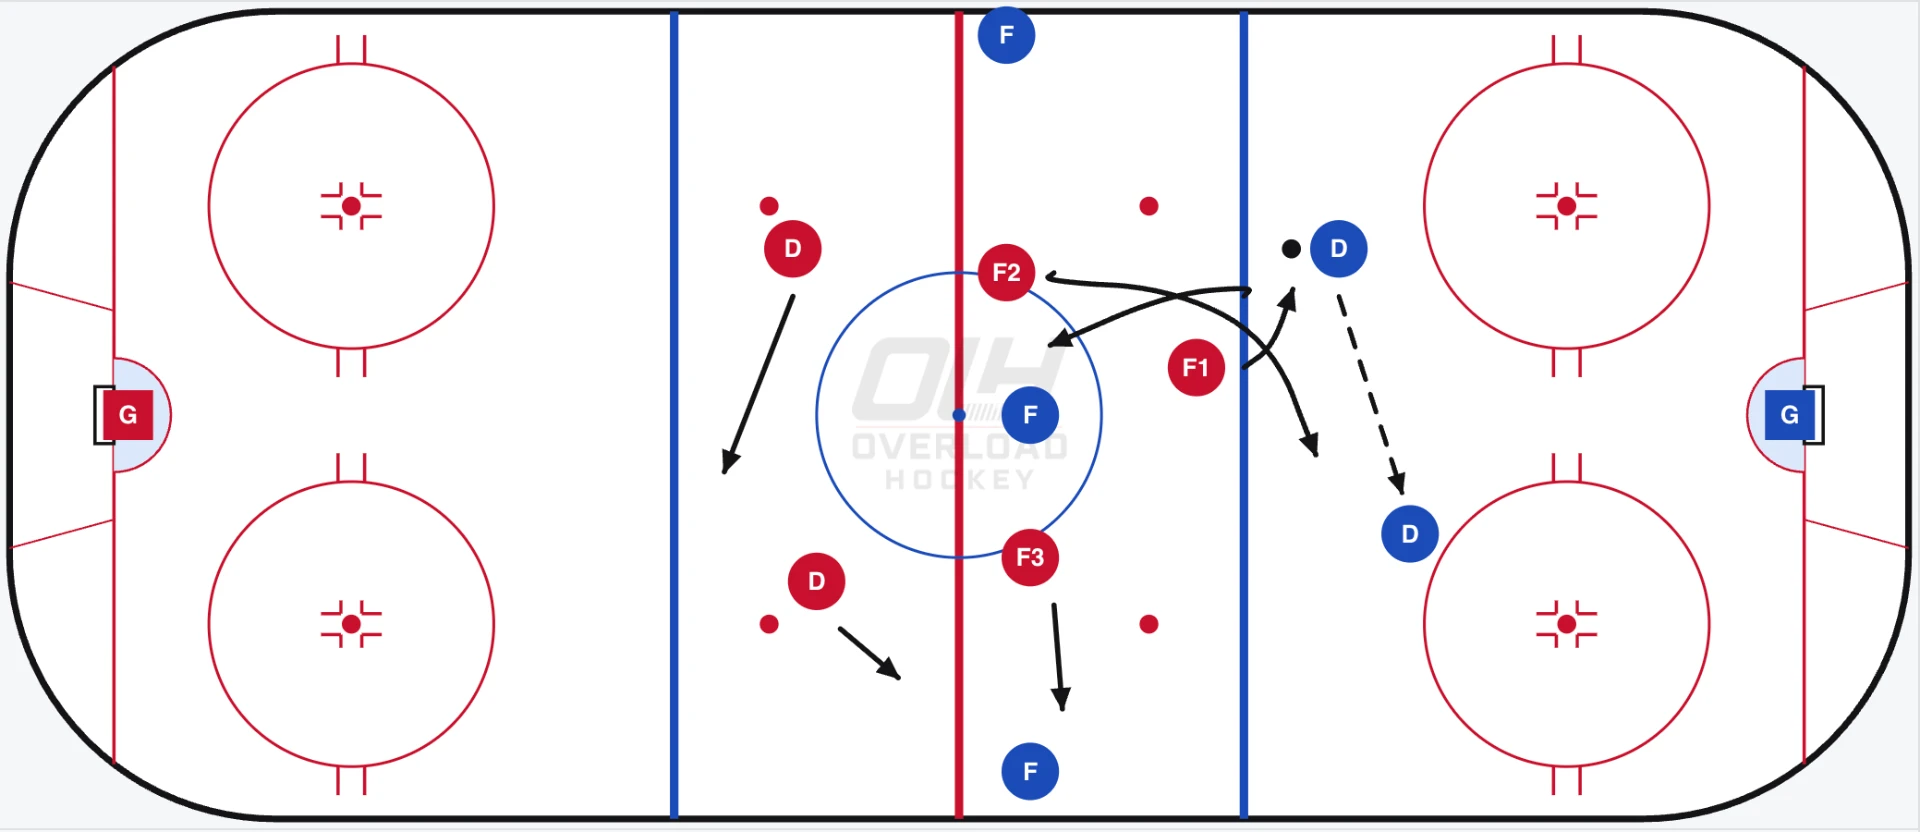
The 1-2-2 neutral zone forecheck protects the middle of the ice while directing the opponent toward the strong side, where the next layer can challenge the puck. The three diagrams show the basic setup followed by two common movement scenarios.
F1
F1 pressures between the opposing defencemen and takes away the D-to-D pass. The approach must force the puck toward the strong side rather than allowing the puck carrier to move it back across the ice.
F2
F2 locks onto the strong-side wing and looks to create a turnover when the puck is moved into that lane.
F3
F3 holds the weak-side third of the ice and stays on the defensive side of any opponent entering that lane.
Strong-side defence
The strong-side defenceman plays aggressively and steps up on the centre if the puck is passed there. The objective is to create a turnover or force a dump-in.
Weak-side defence
The weak-side defenceman plays softer through the middle of the ice and is positioned to be the first player back to the puck if it is dumped into the defensive zone.
What to look for
- F1 takes away the D-to-D pass and forces the puck toward the strong side.
- F2 locks onto the strong-side wing while F3 protects the weak-side third.
- The strong-side defenceman steps up; the weak-side defenceman protects the middle and retrieves dump-ins.
- The goal is to create a turnover or force a controlled dump-in.
Coaching cues
- F1: pressure between the defencemen and take away the return pass.
- F2: lock onto the strong-side wing and arrive ready to create a turnover.
- F3: stay on the defensive side of opponents in the weak-side lane.
- Strong-side defence: step up on the centre when the puck is passed there.
- Weak-side defence: stay soft through the middle and be first back on a dump-in.
Common mistakes
- F1 allowing the D-to-D pass instead of directing play to the strong side.
- F3 drifting out of the weak-side lane or getting caught on the offensive side of an opponent.
- The strong-side defenceman backing off and giving up the line without pressure.
- The weak-side defenceman stepping up too early and leaving no one positioned to retrieve a dump-in.
Related content
Breakout: Slash
Breakout: Slash
A simple breakout that creates three clear options: the wall, low support, and a weak-side slash through the middle.
Defensive Zone: Hybrid Coverage
Defensive Zone: Hybrid Coverage
Three defenders cover low while two forwards protect high; when the puck moves above the circles, all five switch to man-to-man.
Defensive Zone: Swarm & Blitz Pressure
Defensive Zone: Swarm & Blitz Pressure
A coordinated pressure trigger that outnumbers a vulnerable puck carrier, wins possession, and quickly turns defense into offense.